
[Infra] AWS EC2 리눅스 AMI에 아파치(apache) 서버 설치하기
업데이트:
AWS EC2 리눅스 AMI에 아파치(apache) 서버 설치하기
참고링크
- flask, nginx, uwsgi (1)개념
- flask, nginx, uwsgi (2)연동 실습
- AWS에 아파치 서버 설치하기
- 아파치 서버 에러 로그 확인
- 커버로스 인증 개념
- 아파치, 톰캣, nginx 차이
- SSL, CRS 인증 관련 정리(대칭키, 공개키, 개인키)
운영체제 확인하기
먼저 운영체제를 확인합시다. 저는 아마존 Linux AMI 를 사용하고 있습니다. 명령어는 대부분 CentOS와 비슷합니다.
$ cat /etc/issue
Amazon Linux AMI release 2018.03
Kernel \r on an \m
아파치(apache) 서버 설치
$ sudo yum install -y httpd
아파치 서버 시작
$ sudo service httpd start
Starting httpd:         [  OK  ]
(만약 아파치 서버 종료하고 싶다면)
$ sudo service httpd stop
서버 잘 돌아가는지 확인
$ ps -ef | grep httpd
root     13298     1  0 06:27 ?        00:00:00 /usr/sbin/httpd
apache   13305 13298  0 06:27 ?        00:00:00 /usr/sbin/httpd
apache   13306 13298  0 06:27 ?        00:00:00 /usr/sbin/httpd
apache   13307 13298  0 06:27 ?        00:00:00 /usr/sbin/httpd
apache   13308 13298  0 06:27 ?        00:00:00 /usr/sbin/httpd
apache   13309 13298  0 06:27 ?        00:00:00 /usr/sbin/httpd
apache   13310 13298  0 06:27 ?        00:00:00 /usr/sbin/httpd
apache   13311 13298  0 06:27 ?        00:00:00 /usr/sbin/httpd
apache   13312 13298  0 06:27 ?        00:00:00 /usr/sbin/httpd
ec2-user 13342 12346  0 06:27 pts/0    00:00:00 grep --color=auto httpd
방화벽설정
1. (참고)CentOS 7 사용자일 경우(아마존 AMI 사용자이신 경우는 2로 가주세요~)
참고로 centOS 6에서는 iptables를 사용하며, centOS 7에서는 firewalld를 사용합니다.
1-1.firewalld 설치
$ sudo yum install firewalld
1-2. 시스템에 등록 후 작동되도록 실행
$ systemctl unmask firewalld
$ systemctl enable firewalld
$ systemctl start firewalld
1-3. 방화벽설정
$ firewall-cmd --permanent --add-service=http
$ firewall-cmd --permanent --add-service=https
$ firewall-cmd --reload
2. AWS EC2 사용자이신 경우
AWS ec2 사용자이신 분들은 firewalld가 설치가 되지 않으실 겁니다. EC2는 웹콘솔로 접근하셔서 아래와 같은 절차를 진행해주세요.
먼저 인스턴스 상태를 확인하시고 보안그룹을 봐주세요.
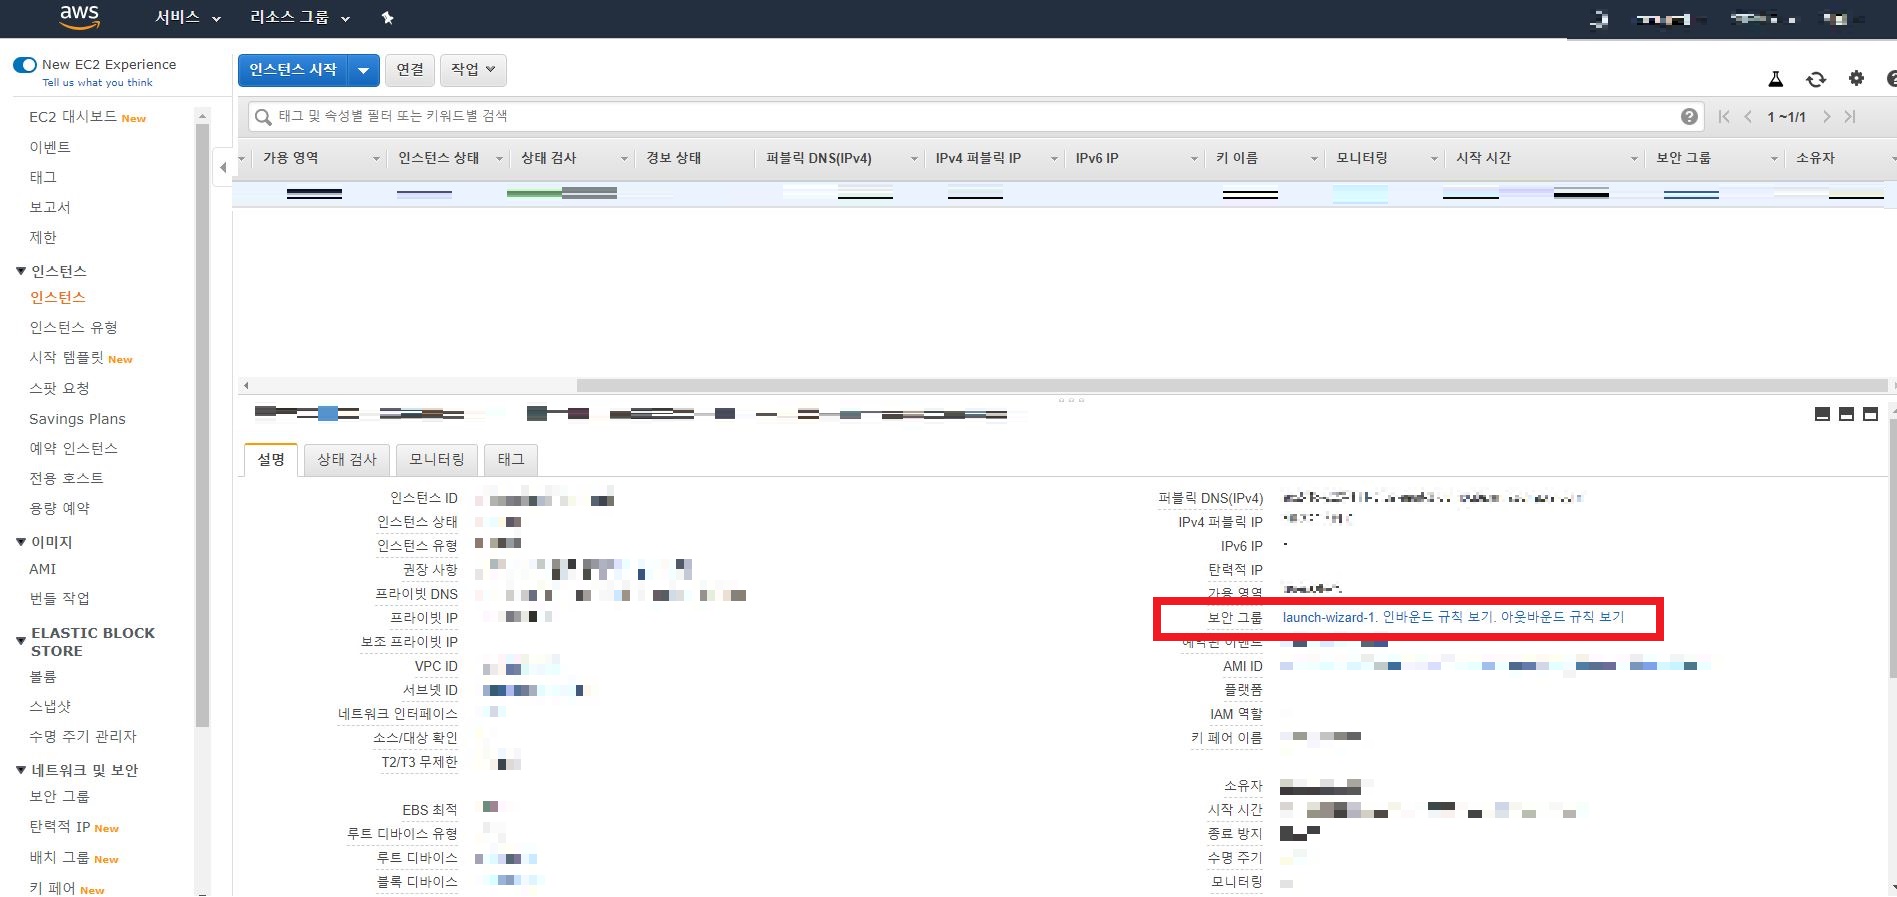
거기서 인바운드 규칙 보기를 보시면 아직 22번 포트밖에 열려있지 않음을 보실수 있습니다. 인바운드 규칙보기 옆에 launch-wizard-1를 누르셔서 설정을 변경합시다.

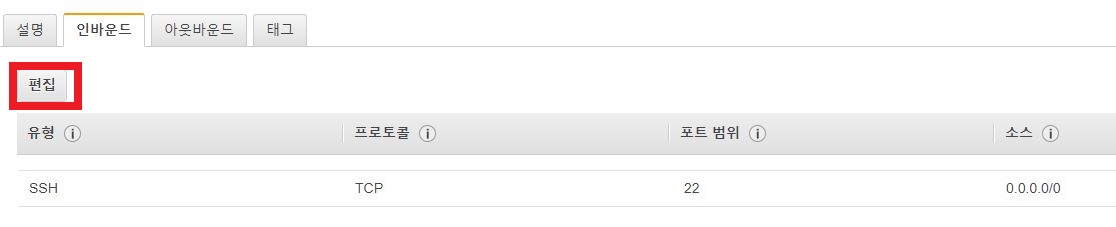
인바운드탭에서 편집을 눌러주세요.
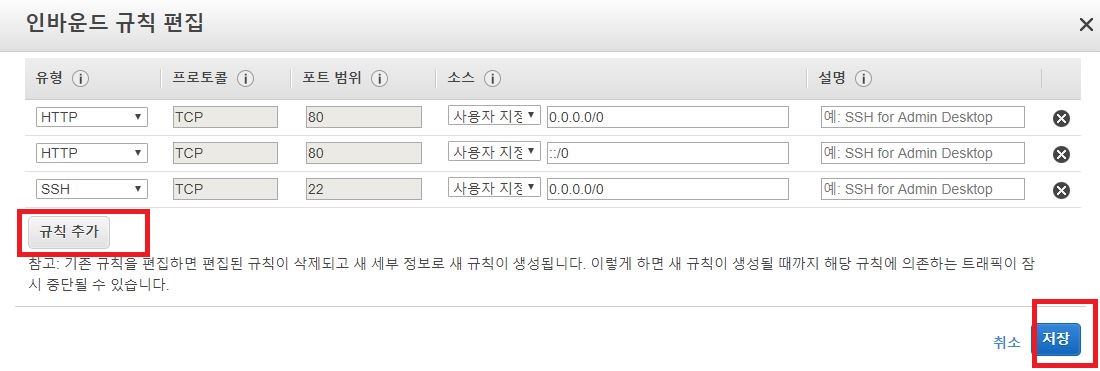
거기서 규칙추가 누르시고 유형은 HTTP, 접근가능 사용자는 “0.0.0.0/0, ::/0” 이라고 입력해줍시다.
이제 마지막으로 웹사이트에 접속되는지 확인해봅시다.
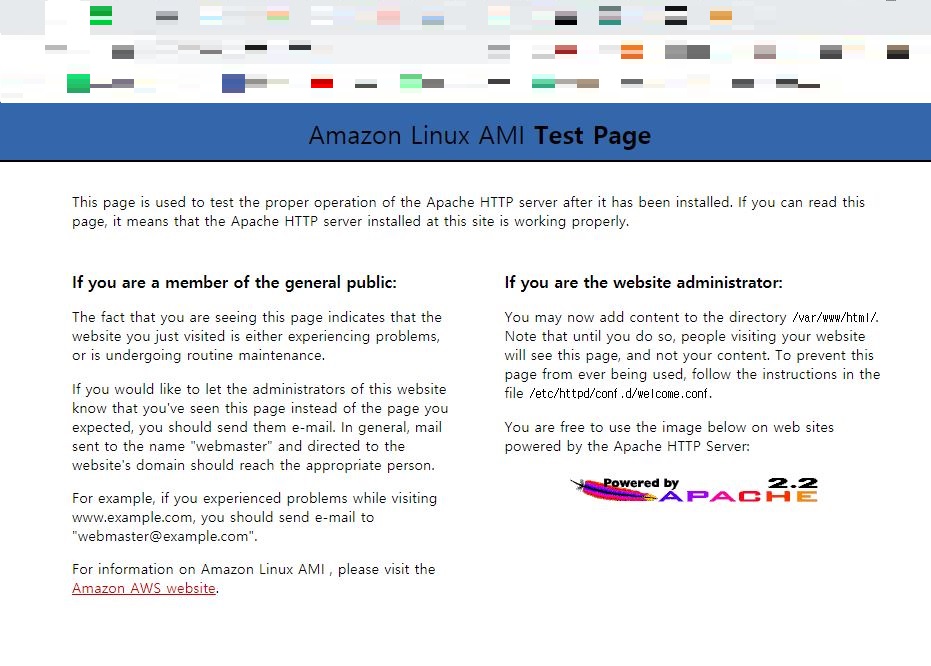
성공적으로 설치된 것을 보실 수 있습니다.
참고사항(디렉터리 설정)
- 아파치 서버 설정파일: /etc/httpd/conf/httpd.conf
$ cd /etc/httpd/conf/
$ ll
total 52
-rw-r--r-- 1 root root 34474 Nov  1  2017 httpd.conf
-rw-r--r-- 1 root root 13139 Nov  1  2017 magic
- 해당파일을 확인하면 DocumentRoot 라고 있는데 거기가 루트 디렉터리입니다. 따라서 보여주고 싶은 파일이 있다면 루트 디렉터리 내에 저장하시면 됩니다. 저같은 경우에는 초기에 “/var/www/html”로 설정되어있습니다.
#
# DocumentRoot: The directory out of which you will serve your
# documents. By default, all requests are taken from this directory, but
# symbolic links and aliases may be used to point to other locations.
#
DocumentRoot "/var/www/html"

#
# Each directory to which Apache has access can be configured with respect
# to which services and features are allowed and/or disabled in that
# directory (and its subdirectories).
#
# First, we configure the "default" to be a very restrictive set of
# features.
#
<Directory />
    Options FollowSymLinks
    AllowOverride None
</Directory>

#
# Note that from this point forward you must specifically allow
# particular features to be enabled - so if something's not working as
# you might expect, make sure that you have specifically enabled it
# below.
#

#
# This should be changed to whatever you set DocumentRoot to.
#
<Directory "/var/www/html">

#
만약 이미지를 보여주고 싶다면 /var/www/html 하위에 img 디렉터리를 만들고 00000000001.JPG 파일을 넣었다고 합시다. 그럼 그림파일의 경로는 /var/www/html/00000000001.JPG 가 됩니다.
$ pwd
/var/www/html/img
$ ll
total 44
-rw-r--r-- 1 root root 41995 Feb 19 12:58 00000000001.JPG
그리고 웹사이트에 잘 나오는지 확인하고 싶다면
http://ip주소/img/00000000001.JPG
로 확인합니다.